

Drilling wear and troubleshooting
Troubleshooting
- Indexable insert drill
- Exchangeable-tip drill
- Solid carbide drill
Indexable insert drill
Oversized holes
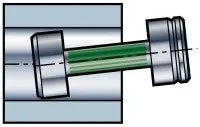
Rotating drill
- Increase coolant flow, clean filter, clear coolant holes in drill
- Try a tougher geometry on the peripheral side (keep centre insert)
Non-rotating drill
- Check alignment on lathe
- Rotate drill 180 degrees
- Try a tougher geometry on the peripheral side (keep centre insert)
Undersized holes
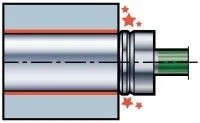
Rotating drill
- Increase coolant flow, clean filter, clear coolant holes in drill
- Try a tougher geometry on the centre side and a light cutting geometry on the peripheral side
Non-rotating drill
- Stationary: Check alignment on lathe
- Stationary: Rotate drill 180 degrees
- Try a tougher geometry at the centre and a light-cutting geometry at the periphery
Pin in hole
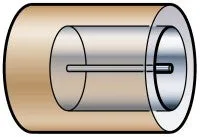
Rotating drill
- Increase coolant flow, clean filter, clear coolant holes in drill
- Try a different geometry on the peripheral side and adjust feed rate within recommended cutting data
- Shorten drill overhang
Non-rotating drill
- Check alignment on lathe
- Increase coolant flow, clean filter, clear coolant holes in drill
- Shorten drill overhang
- Try a different geometry on the peripheral side and adjust feed rate within recommended cutting data
Vibrations
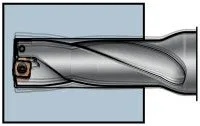
- Shorten drill overhang, improve the workpiece stability
- Reduce cutting speed
- Try a different geometry on the peripheral side and adjust feed rate within recommended cutting data
Insufficient machine torque
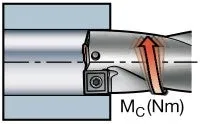
- Reduce feed
- Choose a light cutting geometry to lower the cutting force
Insufficient machine power
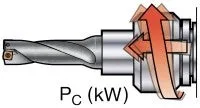
- Reduce speed
- Reduce feed
- Choose a light cutting geometry to lower the cutting force
Hole not symmetrical
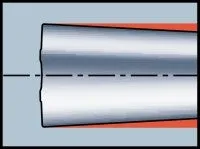
Hole widens at bottom (due to chip jam on centre insert)
- Increase coolant flow, clean filter, clear coolant holes in drill
- Try a different geometry on the peripheral side and adjust feed rate within recommended cutting data
- Shorten drill overhang
Poor tool life
- Check cutting data recommendation
- Increase coolant flow, clean filter, clear coolant holes in drill
- Shorten drill overhang, improve the workpiece stability and check tool holding
- Check tip/insert seat and screw for damage
- See typical drill wear for specific remedies
- Choose a more wear resistant grade if possible
Broken insert screws
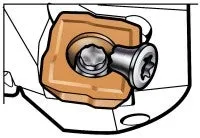
- Use torque wrench to fasten the screw together with Molykote
Bad surface finish
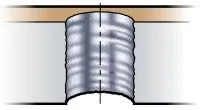
- Important to have good chip control
- Reduce feed (if it is important to keep vf, increase speed as well)
- Increase coolant flow, clean filter, clear coolant holes in drill
- Shorten drill overhang, improve workpiece stability
Chip jamming in the drill flutes
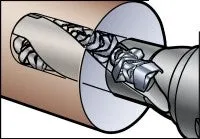
Caused by long chips
- Check geometry and cutting data recommendations
- Increase coolant flow, clean filter, clear coolant holes in drill
- Reduce feed within recommended cutting data
- Increase cutting speed within recommended cutting data
Deflection
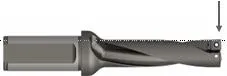
- Hole tolerance out of range
- Bad surface finish - retraction mark
- Wear on tool body
- Insert breakage
| Cause | Solution |
| Cutting forces too high | 1. Choose geometry with smaller corner radius 2. Reduce feed 3. Reduce feed at entrance |
| Insufficient stability | 1. Increase stability 2. Choose a shorter tool body (4xD -> 3xD) |
Chip forming problems
Long-chipping materials, e.g. stainless or low carbon steel
| Result | Possible cause | Solution |
| Bad/long chips - chip jamming | Wrong geometry | Choose geometry –LM |
| Bad surface finish | Cutting speed too low | Increase cutting speed |
| Insert or tool breakdown | Feed too high | Decrease feed |
Short-chipping materials, e.g. normal steel
| Result | Possible cause | Solution |
| Bad/long chips - chip jamming | Non rotating tool (lathe) | Choose geometry for low feed (GR -> GM) |
| Bad surface finish | Wrong geometry | Increase feed |
| Insert or tool breakdown | 1. Cutting speed too low 2. Feed too low | Increase cutting speed |
Exchangeable-tip drill
Out of hole tolerance
- Check tip wear
- Check-run out
- Decrease feed
- Check work piece stability, tool holding and workpiece surface
- Pilot/spot drill for longer drills
- If non-rotating application - check alignment
Vibration
- Shorten drill overhang, improve workpiece stability, check tool holding
- Reduce cutting speed
- Adjust feed/rev
Insufficient machine power or torque
- Reduce speed
- Reduce feed
- Choose a light cutting geometry to lower the cutting force
Hole not cylindrical
Hole widens at entrance
- Check run-out
- Adjust feed
- Shorten drill overhang and check tool holding
- Make a pilot hole with short drill for longer drills
Poor tool life
Check cutting data recommendation
- Increase coolant flow, clean filter, clear coolant holes in drill
- Shorten drill overhang, improve workpiece stability and check tool holding
- Check tip/insert seat and screw for damage
- See typical drill wear for specific remedies
- Choose a more wear resistant grade if possible
Bad surface finish
- Important to have good chip control
- Reduce feed (if it is important to keep vf, also increase speed)
- Increase coolant flow, clean filter, clear coolant holes in drill
- Shorten drill overhang, Improve the work piece stability
Chip jamming in the drill flutes
- Adjust cutting data for improved chip control
- Increase coolant flow, clean filter, clear coolant holes in drill, check coolant concentration
- Problems with chip jamming can cause extreme drill body wear
- Remove any workpiece material stuck on drill body to avoid chip jamming
Entrance chip
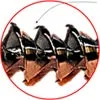
"Needles" on the periphery
- Risk of excessive wear if needles can be seen on the start chip periphery
- Probable cause - imbalance due to: Run-outInclined entranceToo high feedUnstable/weak conditionsCorner breakage/wear
Chip control - Optimization
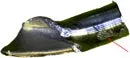
- Scratch mark on the chips as seen above is a sign of chip jamming which influences hole quality in a negative way. To improve hole quality the recommendation is to reduce feed and, if possible, increase speed
Solid carbide drill
Entrance chip – Solid carbide/exchangeable tip drills
"Needles" on the periphery
- Risk of excessive drill wear if needles can be seen on the start chip periphery
- Probable cause - imbalance due to: Run-outInclined entranceToo high feedUnstable/weak conditionsCorner breakage/wear
Chip control - Optimization
- Scratch mark on the chips as seen above is a sign of chip jamming which influences hole quality in a negative way. To improve hole quality the recommendation is to reduce feed and, if possible, increase speed
Drilling wear types
- Indexable insert drills
- Exchangeable-tip drill
- Solid carbide drill
Indexable insert drills
Flank wear
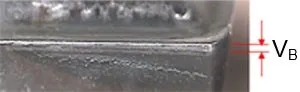
Flank wear is the preferable wear type when balanced. Flank wear can result in
- Poor surface finish
- Hole tolerance out of range
- Power increase
| Cause | Action |
| 1. Cutting speed too high (vc) | 1. Decrease cutting speed (vc) |
| 2. Insufficient wear resistance in grade | 2. Select a more wear resistant grade |
Crater wear
Central insert
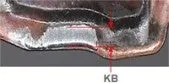
Peripheral insert
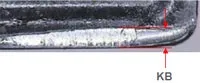
Crater wear can result in
- Weak cutting edge that can cause edge breakage and generate bad chips
- Poor surface finish
- Power increase
| Cause | Action |
| Central-insert: abrasive chips (workpiece material) | Central insert: reduce feed |
| Peripheral insert: diffusion wear caused by high temperature (worse for PVD) | Peripheral insert: 1. Decrease cutting speed 2. Select a more wear resistant grade (often MT-CVD) |
| Select a more positive geometry for better chip formation |
Plastic deformation
Depression
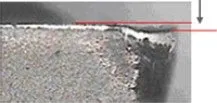
Impression
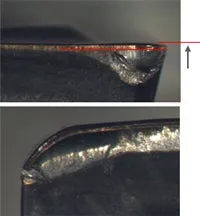
Edge depression or impression can cause poor chip control, poor surface finish and hole out of tolerance.
| Cause | Action |
| Cutting temperature too high, combined with high pressure (feed and/or workpiece hardness) | Decrease feed (fn) Select grade with better resistance against PD (hot hardness) Decrease cutting speed (vc) |
| A final result of excessive flank and/or crater wear | Select grade with better resistance against PD (hot hardness) Decrease cutting speed (vc) |
Chipping in cutting zone
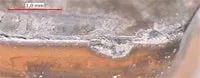
Chipping in cutting zone can result in
- Exaggerated flank wear
- Poor surface finish
| Cause | Action |
| Unstable conditions | Improve stability (tool overhang, fixating) |
| Irregular surface | Reduce feed at entrance. Choose tougher geometry |
| Insufficient toughness of grade | Select a tougher grade |
| Insert geometry too weak | Select a stronger geometry |
| Insufficient cutting fluid | Increase cutting fluid |
| Sand inclusions (cast iron) | Choose a stronger geometry, reduce feed |
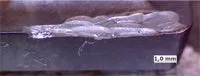
Breakage
Breakage can result in
- Tool break down
- Destroyed workpiece
| Cause | Action |
| Insufficient stability | Improve stability (shorten tool overhang, better workpiece fixturing etc.) |
| Intermittent cutting | Reduce feed, choose tougher geometry (-GR or –GT) |
| Insufficient cutting fluid | Increase cutting fluid |
| Too high feed or too high/low cutting speed | Adjust cutting data |
| Grade too brittle (P-insert) | Choose a tougher grade |
| Insert worn out | Determine safe tool life on peripheral insert |
Built-up-edge (BUE)
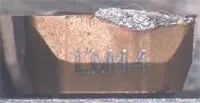
Built-up edge can result in
- Poor surface finish and edge frittering when BUE is ripped away by chips
- Chipping of cutting edge
| Cause | Action |
| Unfavourable temperature (cutting speed) | Increase/decrease cutting speed (high/low temperature) Select a coated grade |
| Too negative cutting geometry | Select a more positive geometry |
| Sticky material | Increase oil mixture and volume/pressure in cutting fluid |
| Too low oil mixture in cutting fluid | Increase oil mixture and volume/pressure in cutting fluid |
Exchangeable-tip drill
Typical wear in different materials for -PM geometry
Unalloyed steel / CMC01.1
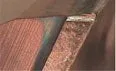
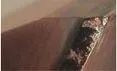


- Margin / periphery wear starts as notch and develops along margin width and into flute
- Continuously growing wear on main edge
Low alloy steel / CMC02.2
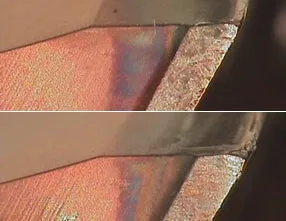
- Continuously growing wear on main edge/margin close to corner
Flank wear
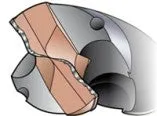
Flank wear on main edge
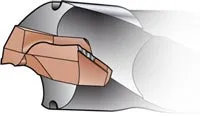
Flank wear on circular land
Normal and preferable wear type when balanced
| Cause | Action |
| Cutting speed too high | Decrease cutting speed |
| Percentage of oil in cutting fluid flow too low | Increase percentage of oil in cutting fluid (check with oil distributor to be sure to not exceed recommended percentages of oil) |
| Insufficient cutting fluid flow | Increase cutting fluid flow |
| Total indicator run-out too large (if wear on margin) | Check radial run-out (if wear on margin) |
Plastic deformation
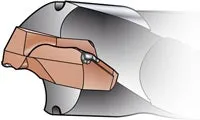
| Cause | Action |
| Cutting speed and/or feed too high | Decrease cutting speed and/or feed |
| Insufficient cutting fluid flow | Increase cutting fluid flow |
Chipping
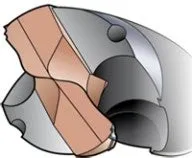
Chipping on periphery
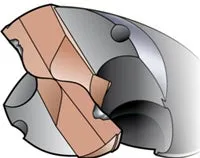
Chipping on main edge
Chipping is a very common wear type when drilling into a pre-drilled hole. If the point angle is smaller on the pre-drilled hole, stability will be poor and the corners can be damaged. This can also happen if tolerances on point angles do not match. This can be avoided with custom made drills or with flat bottom holes made by milling.
| Cause | Action |
| Unstable conditions | Check set-up |
| Total indicator run-out too large | Check radial run-out |
| Feed too high | Decrease feed |
| Insufficient cutting fluid flow (thermal cracking) | Check cutting fluid supply |
Built-up edge
| Cause | Action |
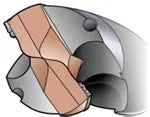
| Unsuitable cutting speed | 1. Increase cutting speed when BUE in centre 2. Decrease cutting speed when BUE in periphery |
| Percentage of oil in the cutting fluid too low | Increase percentage of oil in cutting fluid (check with oil distributor to be sure to not exceed recommended percentages of oil) |
If you cannot fully avoid the BUE zone, calculate a speed that locates the BUE in the strongest part of the drill (= 50% of diameter).
The use of external cutting fluid can influence chip evacuation negatively.
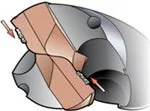
Increase cutting speed to move BUE
towards BUE centre of the drill
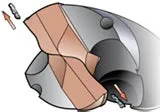
Decrease cutting speed to move
to periphery or eliminate BUE
Solid carbide drill
Flank wear
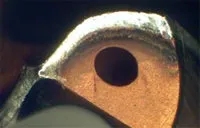
Flank wear on main edge

Flank wear on circular land
Preferable wear type when balanced
| Cause | Action |
| Total indicator run-out too large | Check radial run-out |
| Cutting speed too high | Decrease cutting speed |
| Feed too low | Increase feed |
| Grade too soft | Use a harder grade |
| Insufficient cutting fluid | Increase cutting fluid pressure |
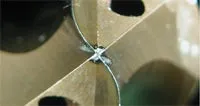
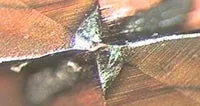
Flank wear on chisel edge
| Cause | Action |
| Total indicator run-out too large | Check radial run-out |
| Cutting speed too low | Increase cutting speed |
| Feed too high | Decrease feed |
Flank wear on chisel edge will also influence on hole quality due to bad centering.
Chipping
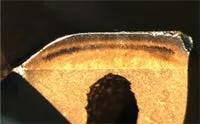
Chipping on periphery
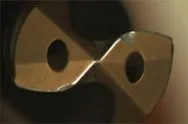
Chipping on main edge
Chipping is a very common wear type when drilling into a pre-drilled hole. If the point angle is smaller on the pre-drilled hole, stability will be poor and the corners can be damaged. This can also happen if tolerances on point angles do not match. This can be avoided with custom made drills or with a flat bottom hole made by milling.
| Cause | Action |
| Unstable conditions | Check set-up |
| Total indicator run-out too large | Check radial run-out |
| Insufficient cutting fluid (thermal cracking) | Check cutting fluid supply |
| Maximum allowed wear exceeded | Adjust cutting data |
Drill breakage
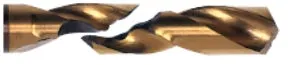
| Cause | Action |
| Total indicator run-out too large | Check radial run-out |
| Unstable conditions | Check set-up |
| Insufficient spindle power | Check cutting data |
| Chip jamming | Check cutting fluid supply |
| Feed too high | Decrease feed |
| Excessive wear | Check wear more frequently |
Built-up edge
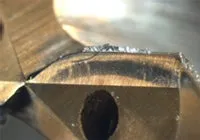

| Cause | Action |
| Cutting speed and edge temperature too low | 1. Increase cutting speed when BUE in centre 2. Decrease cutting speed when BUE in periphery |
| Negative land too large | Sharper cutting edge |
| No coating | Coating on the edge |
If you cannot fully avoid the BUE zone, calculate a speed that locates the BUE in the strongest part of the drill (= 50% of diameter).
The use of external cutting fluid can influence chip evacuation negatively.
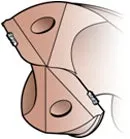
Increase cutting speed to move
BUE towards centre of the drill
Decrease cutting speed to move
BUE to periphery or eliminate BUE
Typical wear
Regardless of material
- Always flank wear
- Chipping is seldom seen Process security
Unalloyed steel / CMC01.1
- Margin / periphery wear Wear starts as notchGrows towards corner
Low alloy steel / CMC02.2
- Corner wear

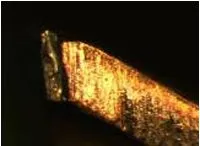
High alloy steel / CMC03.11
- Significant flank wear
- Small damages on corner

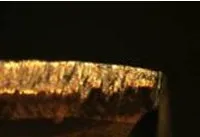
Corner design
Caution!
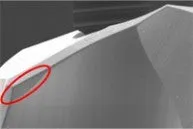
- Do not misjudge the reinforcement as wear
不规则表面钻削
不规则表面钻削 A0 钻削不规则表面会导致钻头切削刃受到过大的不均匀力,从而导致过早磨损。务必遵循准则,必要时减少进给。 详细了解每种钻头类型所面临的挑战和策略。 可转位刀片钻头 可换头钻头 整体硬质合金钻头 A1 可转位刀片钻头 不规则表面钻削 不规则 凸面 凹面 使用尽可能短的钻头,以将振动趋势降至最低并减小偏斜影响 切削速度和最低推荐进给量的推荐起始值 当凹面半径等于或小于钻头半径时,不建议用于... chevron_right
钻削
所有钻削刀具 钻削是在加工周期后期执行的一道关键工序,此时零件的价值已经很高。因此,钻削是整个加工周期生产效率和盈利水平的决定因素。要改进业绩底线,一种立竿见影的方法是投资钻削工序和改善钻削效果。在这里,您可以找到在各种加工工况、材料和应用类型中获得出色孔加工结果的钻削刀具和解决方案。 钻削 钻削是在加工周期后期执行的一道关键工序,此时零件的价值已经很高。因此,钻削是整个加工周期生产效率和盈利水平的决定因素。要改进业绩底线,一种立竿见影的方法是投资钻削工序和改善钻削效果。在这里,您可以找到在各种加工工况、材料和应用类型中获得出色孔加工结果的钻削刀具和解决方案。 您正在进行钻孔加工?让我们的钻削刀具和专业知识帮助您每次都可获得精准完美的孔,从而提高利润率和效率。 钻削刀具... chevron_right
阶梯和倒角钻削
阶梯钻削和倒角钻削 倒角钻削 阶梯钻削或阶梯和倒角钻削 倒角钻削 什么是倒角孔? 所加工的大量孔都需要倒角或至少需要去毛刺。一些典型的例子是螺钉孔和铆钉孔。 有多种钻头可供选择,通过圆弧插补,甚至可以使用车削或铣削刀具。 整体硬质合金钻头 用于45... chevron_right
钻削
钻削公式和定义 查找适合特定任务的切削刀具, 获得即时切削参数建议。 转到CoroPlus ToolGuide 了解如何计算钻削速度和进给是成功钻削的关键。这部分内容将介绍钻削工序所需的钻削公式和定义,例如切削速度、每转进给量和单位切削力。 切削速度 v c (m/min) 切削速度 v c (英尺/分钟) 主轴转速,n... chevron_right
